Issue #02 November 2022
Hi & welcome back for issue 02 of A Bit More Seasoning!
I think I have only just recovered from publishing issue 01 & here we are already, diving head first into November!
There is something incredibly daunting about launching a project into the world that is so personal to you & the little snippets of feedback I have received from people who have read & even cooked from issue 01 has genuinely meant the world to me. I may or may not have had a tiny cry when I heard from the first person who cooked one of the recipes!
Anyway, enough of that…let’s get to the food!
I know that technically this newsletter comes out the day after Halloween but I’m going to go ahead and say it anyway…IT’S SPOOKY SEASON! Which isn’t actually that great for me because I am NOT a fan of being scared! Scary movie? No thanks. Something goes bump in the night? Get me the hell out of there! However, with the night’s drawing in earlier & those chilly frosty mornings, it means some wonderful things for seasonal produce!
Now is the season for hardy winter vegetables which thrive when the frost comes in. Kale is the ultimate frost lover but cabbages, parsnips and leeks all do just as well.
November also means that Game Season is in full swing, think Venison, Grouse, Pheasant & Partridge. Each species has its own season in the UK & Grouse season ends on the 10th December in England, Scotland & Wales so make the most of it now.
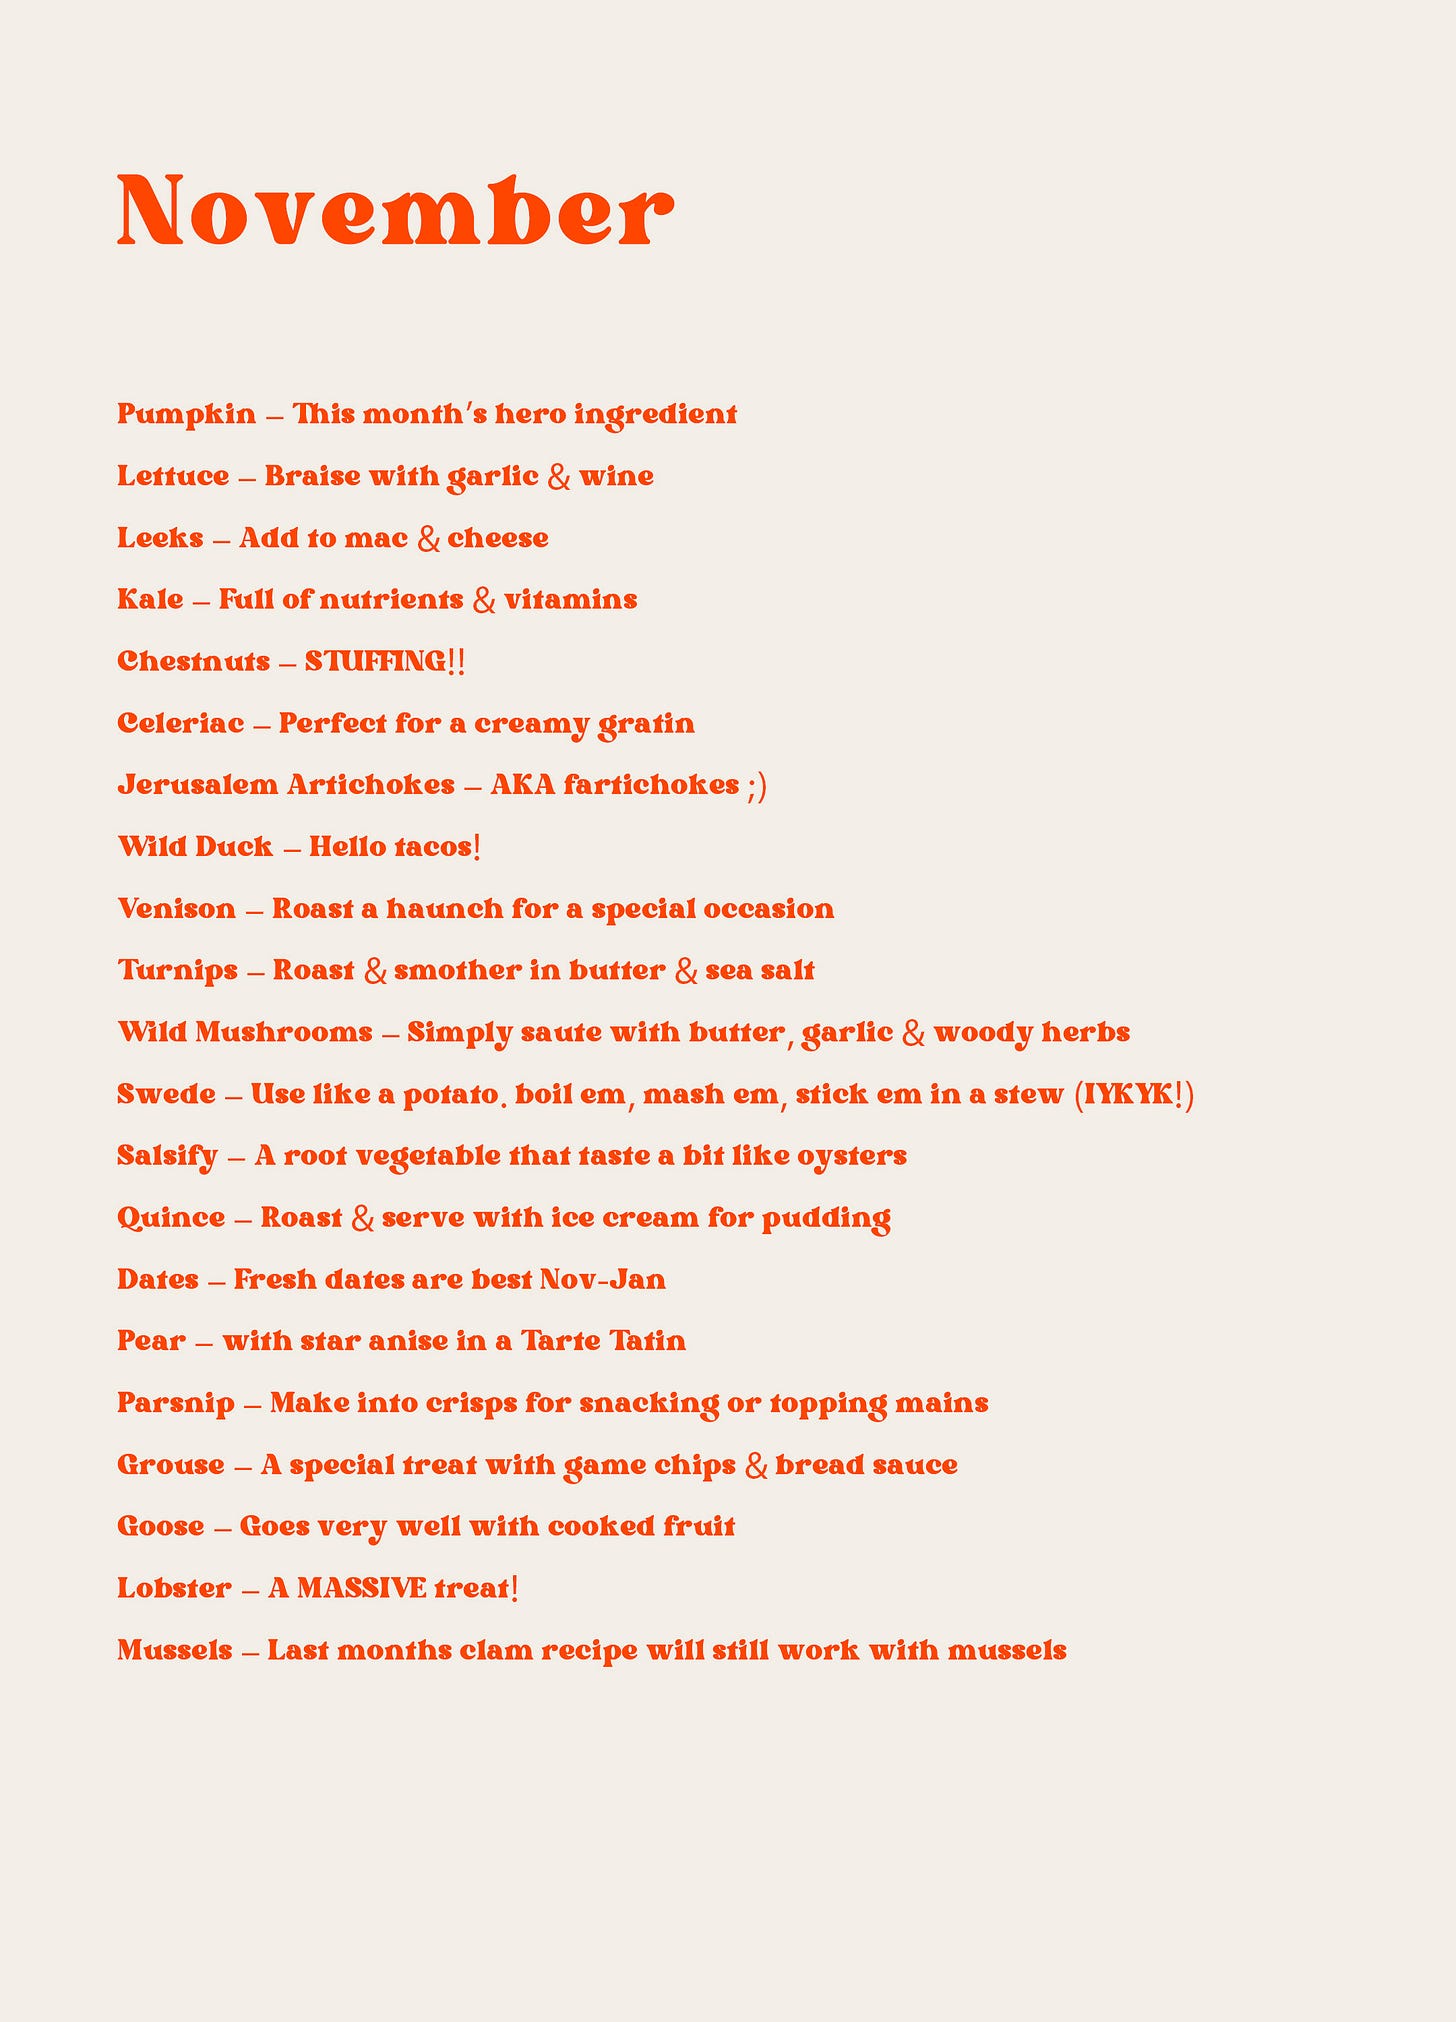
What’s at its best this month…
Hero Ingredient Pumpkin
Naturally, the very first thing almost everyone thinks of when they see a pumpkin is Halloween but these Winter Squash have far more to offer than just becoming a spooky decoration!
There are over 150 varieties of pumpkin & some make for better eating than others…the recognisable grey/green skin of a Crown Prince is one of my favourites, followed by the Delicia which has a darker green skin & is amazing roasted & served with oozy mozzarella & topped with toasted hazelnuts.
Pumpkins are hugely versatile & work well in both sweet & savoury dishes, as you’ll see in this month’s recipes!
Pumpkins are part of the Cucurbitaceae family (nope, I hadn’t heard of it either!), which also includes all of the squashes along with cucumbers and melons!
Recipe 01
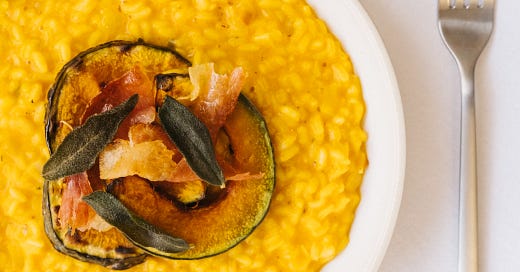
Pumpkin Risotto
I bloody love risotto! How can you not love a bowl of what is essentially cheesy rice!? Okay maybe that doesn’t actually sound that delicious but risotto is one of my go to dishes that is far easier to make than people think…It just needs some love & attention!
When developing this recipe, I started with making a standard base risotto & adding pieces of roasted pumpkin at the end to turn it into a pumpkin risotto, but it just didn’t feel pumpkiney (?!) enough, so I played around trying to get more flavour into it & that’s where the pumpkin puree came in.
Making a pumpkin puree to add to your risotto may sound a little cheffy, but I promise you, it’s really not & it is SO worth going to the tiny bit of extra effort to make this something that is worthy of being served at a dinner party or eaten out of a bowl, curled up in your pajamas, watching something trashy - which I personally think is the best way to eat a risotto!
If you cannot find pumpkin then butternut squash works just as well & is more readily available.
Ingredients
Serves 4
1 medium pumpkin (at least 1kg)
300g Arborio rice (risotto rice)
200ml vermouth or white wine
70g Parmesan, finely grated
1 onion, finely chopped
3 cloves garlic, finely chopped
Bunch of fresh sage, finely chop about 8 leaves & keep the rest whole
20g Butter
1.5-2L Chicken stock (or veggie if you prefer)
4 slices prosciutto ham, optional
Oil
Salt & pepper to season
Method
For the Risotto
1. Preheat your oven to 180 degrees / gas mark 4.
2. Carefully chop your pumpkin in half (you might find putting a tea towel underneath the pumpkin helpful to stop it sliding all over the place!). Put one half to the side. Remove the skin and roughly chop the remaining half into approx 2 cm chunks, these are going to be pureed so no need to worry about being neat & tidy.
3. Cut the other half of the pumpkin into neat slices and put both the chunks and slices onto a baking tray, drizzle with olive oil & roast in the oven for around 25 minutes or until soft & cooked.
4. As soon as the pumpkin is in the oven, you want to start the risotto. Heat a few tbsps of oil In a large pan on a medium heat & add the onion. Once the onion is soft & translucent add the garlic & chopped sage then cook for around 3-5 minutes.
5. Add the rice & stir to coat it in the oil. Cook this for a couple of minutes, then add the wine. Once the wine has been absorbed you can start to add the stock, one ladle at a time, waiting until the liquid is almost completely absorbed before adding the next ladle & keep giving it a stir. Continue this process until the rice is cooked – check the instructions on your rice packet but this is usually around 25-30 mins.
6. About 20 minutes into cooking the risotto, check the pumpkin in the oven. When the chunks of pumpkin are soft & cooked, transfer them to a food processor or blender with a few ladles of stock & blitz to make a smooth puree. If you don’t have a blender, put the pumpkin & a little stock in a large bowl & puree with a fork. Add the puree to the risotto & stir well to combine.
7. The sliced pumpkin can remain in the oven until the risotto is finished.
8. If you are including the prosciutto, now is the time to pop it in the oven on a baking tray for 5-10 mins to crisp up. It will continue to crisp when you remove it from the oven so just keep an eye on it & allow at least 5 mins out of the oven before serving.
9. Once the risotto rice is cooked, stir in the parmesan & then add the butter, season to taste & stir to make a beautiful glossy risotto.
10. Serve topped with the crispy sage leaves, prosciutto & roasted pumpkin.
For the Crispy sage leaves
Heat a pan with about 1 cm oil to medium-high.
Carefully add the sage leaves & cook for approx. 30 seconds on one side, then flip them over & cook for a further 30 seconds.
Remove them from the oil & put on a plate with some kitchen roll to absorb the excess oil.
Sprinkle with sea salt.
Recipe 02
Pumpkin Cake
The thing with buying a whole pumpkin is that because they are so big, once you’ve made one recipe there is often a lot leftover & then you’re like WTF do I do with all this pumpkin?! Well I’m here to show you that you do not need to default to soup! Not that there’s anything wrong with pumpkin soup, it can be delicious, but if you were to offer me a bowl of soup or a cake, it would take me around 0.1 milliseconds to make my decision on which I’d prefer.
This recipe is a very slight adaptation of Ravneet Gill’s Carrot Cake from her absolutely brilliant first book, The Pastry Chef's Guide . If you are even remotely interested in making anything sweet, I couldn’t recommend her books enough.
The frosting is my trusty go to BBC Good Food recipe, with the addition of some orange.
Ingredients
For the Cake
270g grated pumpkin
3 eggs
150g dark brown soft sugar
110ml vegetable oil
75g desiccated coconut
150g wholemeal flour
100g nuts (pistachos, hazelnuts, pecans etc)
15g baking powder
Zest of 1 orange
1 tsp ground cinnamon
1 tsp ground ginger
¼ tsp ground nutmeg
For the frosting
100g butter, softened
100g icing sugar
200g full fat soft cheese
1 tbsp orange juice
Method
Preheat your oven to 185 degrees / gas mark 5
Grease a 2lb loaf tin with butter & line with baking parchment.
Add the eggs & sugar to a bowl & beat until combined.
Pour the oil slowly into the egg & sugar mixture while whisking to incorporate.
Fold in the grated pumpkin, nuts, orange zest & coconut.
Sift together the flour, baking powder, cinnamon, nutmeg & ginger then fold this into the wet mixture.
Pour the batter into the prepared loaf pan & bake for 45-50 minutes or until a skewer inserted comes out clean.
Leave to cool.
For the Frosting
To make the frosting, beat the butter to a soft consistency.
Add the sugar to the butter, then cream together until it resembles a smooth buttercream.
Add the cream cheese & orange juice & slowly combine.
Wait until the cake has completely cooled before you try to add the frosting.
The cake will keep for a few days in an airtight container.
Recipe 03
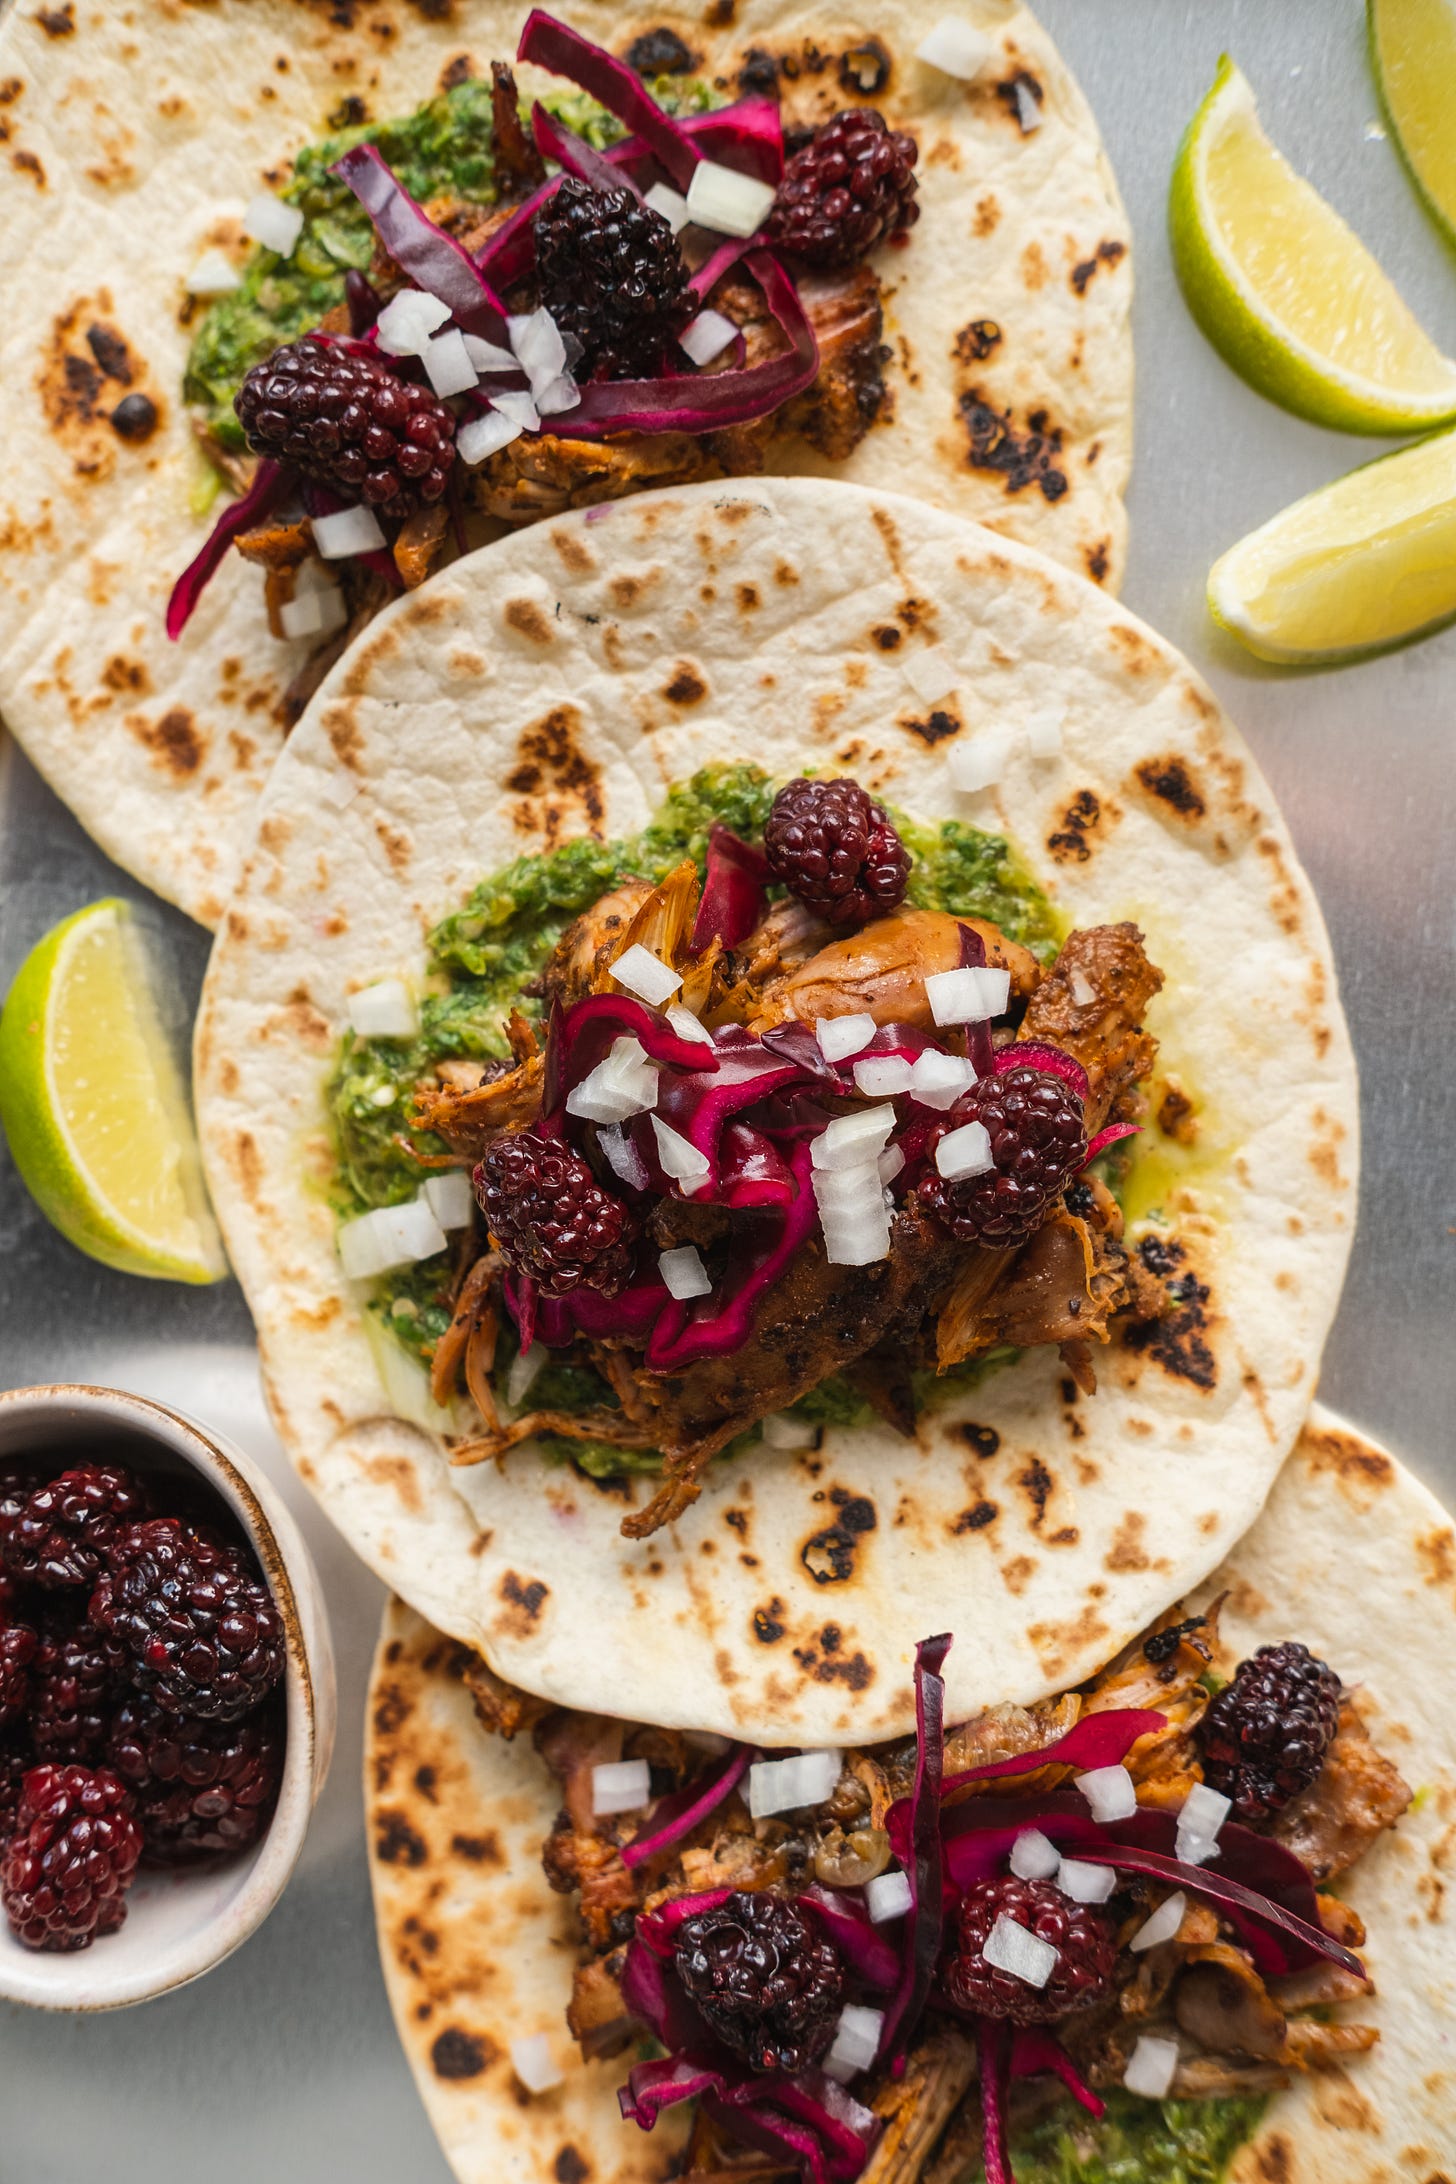
Duck Tacos
I don’t eat duck that often, but when I think about how versatile it is, I’m surprised I don’t eat it more frequently. It is also packed full of protein as well as minerals like zinc & iron.
As described below by Tim Wilson, the Farmer & Butcher behind The Ginger Pig finding humanely raised duck is actually harder than you might think & whilst my aim with A Bit More Seasoning is not to preach at you, I think there are some things we all need to be aware of if we choose to eat meat.
‘‘One common problem in the mass farming of ducks is lack of water. Ducks need water, not only for drinking, but also for swimming in. Many intensively reared ducks only ever see water in a small drinking trough.
You need to find a good butcher or supplier who can sell you humanely reared poultry. Select a duck with dry, pale, blemish-free skin and a long plump breast. As with all poultry, look at the label and aim for traditional free range or free range.’’
Wild duck season runs from October – November & will usually be Mallard or Teal. Always ask your butcher or supplier about where the ducks originated from.
I highly recommend buying a whole duck & breaking it down into legs, breast & carcass yourself. I know this might sound intimidating but there are so many YouTube tutorials to follow & it is actually quite straightforward, it just takes a little practice. If that’s a bit too much however, then you can ask your butcher to do this for you or just buy duck legs for this recipe.
This recipe uses several seasonal ingredients including cabbage & blackberries, which might not be something you would associate with a taco but trust me, it really works! If you have a glut of blackberries leftover from the season, I highly recommend this Sweet & Sour Pickled Blackberry Recipe from Larder Love.
Note: for the best results, marinate the duck the day before you plan on cooking.
Ingredients
Serves 2 (double up to serve more)
For the marinade
1 tbsp Ancho chilli flakes
1 tbsp smoked paprika
1 tsp Chipotle chilli flakes
1 tsp ground cumin
1 tsp ground coriander
1 tsp dried oregano
Juice ½ an orange
2 tbsp oil
Salt & pepper
For the Duck
2 Duck legs
½ white onion cut into rough quarters
For the salsa
2 green chilies
Large bunch coriander
Juice of 1 lime
Large pinch of salt
To Serve
Flour tortillas
Pickled blackberries
½ an onion finely diced
1 lime quartered
Shredded cabbage – I lightly pickle this with juice of one lime, 1 tbsp apple cider vinegar & some sea salt.
Method
In a baking dish, combine all the marinade ingredients to make a paste. Add the duck legs & onion then coat in the marinade. Cover & leave to marinate in the fridge overnight.
Take the duck out of the fridge 30 minutes before cooking to bring to room temperature.
Preheat the oven to 160 degrees / gas mark 3.
Add ½ cm of water to the bottom of the baking dish (this will stop the duck from drying out during cooking) & place the duck in the oven.
Cook the duck legs low & slow for 1 hour & 45 minutes. If at any stage the duck looks to be drying out, cover the dish with tin foil.
Whilst the duck is cooking, make the salsa. Put the whole green chillies on a baking tray & roast in the oven for 15-20 minutes or until they start to take on some colour.
Once the chilies have coloured, remove the stalks & add to a food processor or blender with all the fresh coriander (stalks included), juice of one lime & some salt. Blitz to your desired consistency.
When the duck is cooked, remove from the oven & let it rest for at least 10-15 minutes.
Shred the meat off the bone & mix with the remaining cooking juices to coat the duck.
Serve on warm flour tortillas. I like to add the salsa to the tortilla first, then the duck & then the rest of the toppings.
Enjoy!
If you made it this far, thanks so much for reading & if you enjoy A Bit More Seasoning please consider subscribing if you haven’t already.
Thanks again & see you in December!


